


Most people set up Skygen AI in an afternoon and wonder why it’s not saving them as much time as they expected.
The answer is almost always the same. They skipped the configuration work that makes the outputs actually fit their context. They treated onboarding like installing an app — open it, click through the setup wizard, start using it. That’s not how this works.
The teams that get real value from The cloud AI — the ones recovering hours per week within the first month — did the setup work properly. This guide is the setup work, explained clearly.
Before You Start: Get Clear on What You’re Automating
The single most important thing you can do before touching any settings is answer one question: which specific tasks are eating the most time right now?
Not “marketing work in general.” Specific tasks.
Is it brief preparation? How many briefs per week, for how many clients or projects? Is it reporting? Which platforms, what cadence, who receives the reports? Is it social content? How many posts, which platforms, what content types?
Write it down. Seriously. The teams that do this upfront configure Skygen AI around their actual workflow. The ones that skip it configure it around a hypothetical workflow and then wonder why the outputs don’t fit.
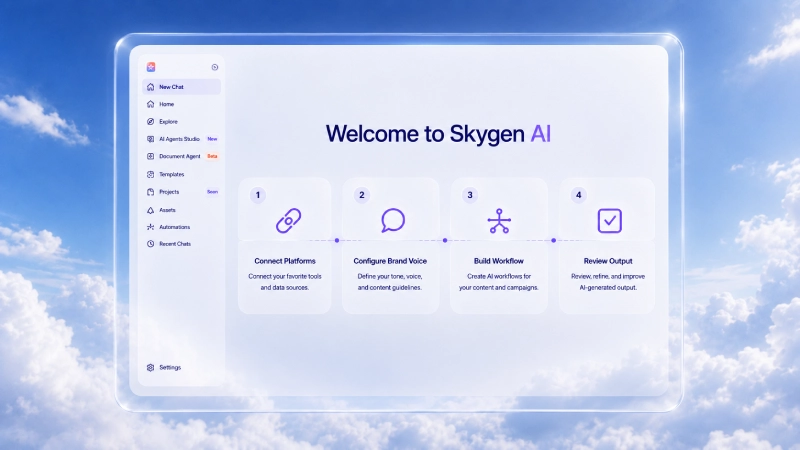
Step One: Connect Your Platforms
Start with the integrations that matter most for your highest-volume tasks.
For Reporting
Connect every platform you pull data from for client or internal reports. Google Analytics, Google Search Console, your ad platforms, your social accounts. The more complete the connection, the more useful the report assembly becomes.
Go through each connection carefully. Check that the data is flowing correctly before you rely on it. A reporting integration that’s half-connected will produce outputs that look complete but aren’t — which is worse than no output at all.
For Keyword Research and Briefs
Make sure your primary projects or client accounts are set up with the right context. Industry, target audience, competitive landscape, any topics or keywords to avoid. This context shapes the brief outputs significantly.
If you’re an agency, set up separate workspaces per client from the start. Mixing client contexts produces generic outputs that fit nobody well.
For Social Content
This is where the configuration work pays off most visibly.
Upload examples of your best-performing posts for each client or brand. Not mediocre ones — the ones that actually got engagement. The more specific the examples, the better the voice calibration. Skygen AI learns the pattern from what you show it.
Define the content types you use regularly. Educational posts, product highlights, engagement questions, behind-the-scenes — whatever your content calendar includes. The more specific you are about the structure, the less editing you’ll do on the drafts.
Step Two: Configure Brand Voice
This step gets rushed. It shouldn’t be.
Brand voice configuration is what separates outputs that need heavy editing from outputs that need light review. If you put generic inputs in here, you get generic outputs. If you put specific, detailed inputs, the outputs fit.
What Good Voice Configuration Looks Like
Don’t just describe the tone in adjectives. “Professional but approachable” tells the system almost nothing. Show it instead.
Paste in three to five examples of content that perfectly represent the brand voice. Actual posts, actual emails, actual briefs — not descriptions of what the content should sound like. The examples are the reference point.
Then add specific rules. Words or phrases the brand uses consistently. Words or phrases to avoid. Sentence length preferences. Whether the brand uses first-person or third-person. How it handles calls to action.
The more specific, the better. This takes thirty minutes to do properly. It saves hours of editing downstream.
Step Three: Build Your First Workflow End-to-End
Don’t try to use every feature at once. Pick one workflow — the one that currently takes the most time — and run it end-to-end with Skygen AI before moving to anything else.
If it’s brief generation: take a real upcoming brief, run it through Skygen AI, review the output carefully, note what’s good and what needs adjustment.
If it’s reporting: connect the relevant platforms, run a report for the most recent period, and compare it to what you’d have produced manually.
The goal of the first run isn’t to produce something perfect. It’s to understand where the output fits your workflow and where it needs adjustment. That information is what you use to improve the configuration before you start relying on it at scale.
Step Four: Build the Review Process
Skygen AI produces starting points, not finished products. The review process is not optional — it’s part of the workflow.
What a good review looks like:
For briefs: Check that the angle is right for the specific client context. Verify the keyword recommendations make sense. Add any client-specific direction the tool doesn’t have context for. This should take fifteen minutes, not two hours.
For reports: Verify the numbers match what you’d see pulling the data manually. Add the strategic commentary — what the data means and what to do about it. This is the part that requires your expertise. The assembly is handled.
For social drafts: Check for voice accuracy. Add the specific angle or hook if the draft is too generic. Approve or edit. This should be editing, not rewriting.
If you’re spending more than twenty minutes reviewing any single output, the configuration needs adjustment — not more review time.
Common Mistakes and How to Fix Them
Generic brand voice inputs. Fix: replace adjective descriptions with actual content examples.
One workspace for all clients. Fix: separate workspace per client, configured individually.
Skipping platform connections. Fix: connect all platforms before your first real run, not after.
Expecting perfect outputs immediately. Fix: treat the first two weeks as calibration, not production. Review outputs carefully, note patterns, and adjust configuration.
Not using it consistently. Fix: build specific tasks into your weekly workflow explicitly. The efficiency gains come from consistent use, not occasional use.
What to Expect in the First Month
Week one and two: calibration. Outputs will be good but not perfect. You’ll find gaps in the configuration. Fix them as you go.
Week three and four: the workflow starts to feel natural. Review time drops. The outputs fit your context more reliably.
Month two onwards: the compounding starts. The tasks that used to take the most time are handled. Your team’s capacity is in the right place.
The teams that get frustrated with Skygen AI and give up almost always quit during the calibration phase — before the configuration is solid enough to deliver the efficiency they were expecting.
Don’t quit during calibration. That’s when the work is happening. The returns come after.
Skygen AI onboarding done properly takes a few days of focused setup work. It’s not glamorous. It’s also what determines whether you end up with a tool that saves real time or a subscription you stop using.
Do the configuration work. Build the review process. Run the first workflow end-to-end before scaling.
Everything else follows from that.

Comments are closed.