The Apple Watch is one of the best smartwatches on the market, hands down. And that’s not just us. Consumer Reports agrees. Few other watches do such a comprehensive job of keeping you in shape, and it features some of the most accurate vitals monitoring hardware in the industry. Then there’s the software. If you own an Apple Watch, you know that the team working on it really seems to think of everything, but some of its best features are the ones that aren’t turned on from day one.
In this list, we aim to consolidate the best Apple Watch features that aren’t enabled by default. With few exceptions, these features are available on basically any recent Apple Watch that’s receiving updates. We’ll let you know when they aren’t. Let’s discuss what these 14 features do and how you can turn them on in a couple of easy steps — and hopefully, they’ll be so useful you never turn them off.
Control other Apple devices
Since the Apple Watch is a secondary device that’s almost always attached to your wrist, Apple has thought up some clever ways for it to supplement your primary Apple devices. The best example is using your Apple Watch as an Apple TV remote. Make sure your Apple Watch is on the same account and Wi-Fi network. Open the Apple Watch’s Remote app (you’ll see a tiny icon of the Apple TV remote) and add your Apple TV. Input the pairing code, and voilà. Having used this one a lot, it’s incredibly handy for basic controls when you’re all snuggled up and the actual remote is out of reach. Note, your iPhone can also work as an Apple TV remote by opening Control Center and tapping the remote icon.
Another highly useful role for your Apple Watch is to securely unlock your devices. First, your iPhone. iPhones already have fast and secure Face ID, but if you want to unlock your iPhone in situations where your face is obstructed — say, by your pillow, or something — your Apple Watch can do it automatically. Open the iPhone’s Settings app, go to Face ID & Passcode, then look for the “Unlock with Apple Watch” option. You’ll get a wrist tap when the unlock happens. This also works in reverse. In the Apple Watch app, under Passcode, enable “Unlock with iPhone.”
And finally, you can unlock your Mac the same way. In System Settings > Touch ID & Password, enable the toggle under “Apple Watch.” This will automatically unlock your Mac when you wake it and will prompt you anytime there’s a request for the administrator password. If you’re using a closed MacBook with an external display, this is a must-have.
Retrace steps with Backtrack
Are you the sort of person who easily gets lost? The Backtrack feature on your Apple Watch will quickly become your best friend. It uses your Apple Watch’s built-in Compass app to figure out your heading and then guide you step-by-step back to where you began. It’s intended for outdoor environments rather than urban spaces, so if you’re in a city center, you’re probably better off with a map app. Also know that a lot of hiking trails are on Apple Maps, too, so you should be using those first if you’re looking for turn-by-turn directions on known trails while away from civilization. Backtrack is more of a “rainy day” tool when those two options aren’t available or your cell signal is weak. Say, for example, you’re lost and need to try a different course to get back to the original trail without getting more lost.
It’s worth noting, Backtrack has to be turned on before your bushwhacking; open your Compass app, tap the Backtrack icon, and choose Record Path. It will quietly map your steps in the background until you tap “Retrace Steps.” At that time, you’ll get compass-based directions for the return leg of your little tangential journey.
It goes without saying, though, please don’t trust your life on this. Backtrack is more of an aid than a foolproof navigation feature; if you’re using this to make long, risky ventures into the wild unknown, you’re using it wrong.
Take public transit more easily with Express Mode
If you regularly take public transportation and your local trains and buses support using the Apple Watch to scan your card, then you probably already know about this one. But if you don’t, or you’re going to visit a new city, this will come in handy. Express Mode basically makes your Apple Watch behave as if it were a physical transit card, requiring nothing to trigger it and no online connectivity to work. So you’ll be able to tap your way through the turnstiles simply by placing your Apple Watch near the reader.
To set it up, add the transit card you want to your Apple Wallet with the plus icon, then “Transit Card.” You can use the search function to find a specific card name or location. If you already have a transit card set up in its own app, you may be able to add it to the Wallet app. Now, you’ll need to make sure that the transit card is available on your Apple Watch. In the Wallet app, choose “Add Card,” then find that card under “Cards Found For You.”
Express Mode will turn on by itself if you already have a supported transit card (or a normal credit card) set up in your Apple Wallet. However, it may default to the wrong card. Check it to make sure. In the iPhone Wallet app, check your card details under the More button, then “Express Transit Settings.” Make sure the card you see there is the one you want to use. From then on, it’s smooth sailing. Based on personal experience, this one works so well that you may never have to fumble through your wallet for your transit card ever again.
Take screenshots and change up the app view
By default, the Apple Watch cannot take screenshots, perhaps because you have very little reason to do so. It’s pretty hard to accidentally take a screenshot, though, so we’d recommend digging into the settings and turning this one on just in case you need it at some point. From the Watch app, head to General and “Enable Screenshots,” or General > Screenshots > Enable Screenshots on your Apple Watch instead. Now all you have to do to take a screenshot is press both side buttons at once, and the screen will flash, similar to when you’re taking screenshots on your iPhone. To view and edit that screenshot, you’ll need to go to your iPhone’s Photos app.
Before watchOS 11 in 2024, the Apple Watch only had one way to look at apps: grid view. For many (myself included) this was quite annoying, especially because it forced you to drag in all four directions to find the app you wanted, and those tiny icons could be hard to tell apart; good luck differentiating the alarm from the stopwatch and timer. Out of the box since watchOS 11, new Apple Watch users could also choose List View, where each icon appears with the app name beside it.
If you bought your Apple Watch before that update and are still on grid view, you might wanna try this one. On your Apple Watch, scroll to the very bottom of the app view screen, or go to Settings > App View and change to List View. Note, you can also do this from your iPhone while you’re rearranging the icons to taste.
Manage your heart health
The Apple Watch is jam-packed with heart health features, making it a must-have device for people who want to care for their heart health, or perhaps who even have a heart condition. There are a few heart health features that aren’t enabled by default. One is AFib tracking. Apple requires you to have a diagnosis and to wear the Apple Watch at least 12 hours a day, daily. Then, from the iPhone Health app, go to AFib History and follow the setup process. Once a week, you’ll get a summary of the previous week’s readings.
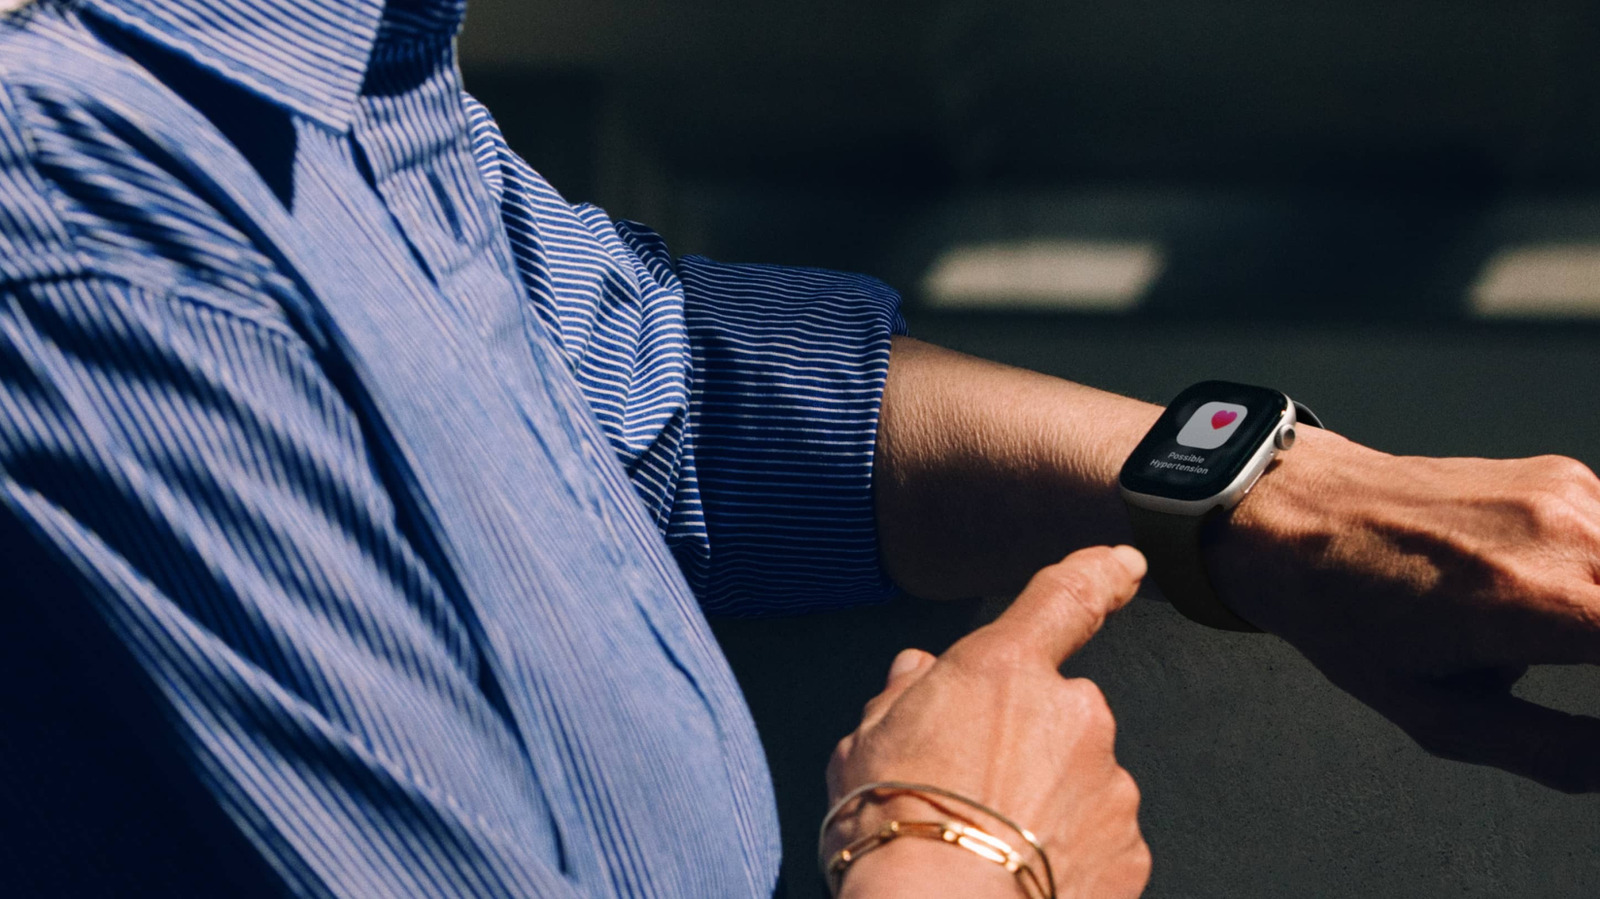
Another feature we’d recommend enabling is hypertension notifications, though you’ll need an Apple Watch Series 9 or Apple Watch Ultra 2 at minimum, and be in a supported region. Open the iPhone Health app again, choose your profile icon, then go to Features > Health Checklist > Hypertension Notifications. Apple says that the feature is restricted to people who are at least 22 years old, not pregnant, and who haven’t been diagnosed with hypertension yet. It’s worth noting that this is not like a cuff that will read blood pressure in real time. Rather, it monitors you over a 30-day period and looks for signs that you might have high blood pressure, after which you should consult your doctor.
The list doesn’t stop there. Under the Heart settings, you can have your Apple Watch alert you if your heart rate is too low (or too high), if it has detected an irregular heart rhythm, or if your cardio fitness is low. Some Apple Watch models can also administer an ECG test on demand. The Apple Watch has helped alert people who didn’t know they had a heart conditions many times, so turn these on if applicable.
Quietly check the time (or hear it out loud)
The Apple Watch lends itself to quite a bit of customization via watch faces and complications. You can download more watch face apps if you don’t like the defaults available to you. However, the Apple Watch can tell time with more than just a watch face. If for some reason you can’t look at the screen, press and hold the watch face with two fingers, and your watch will verbally tell you the time. You’ll need to enable this first in Settings > Clock > Speak Time.
A quieter, less obtrusive way to tell time is with what Apple calls “Taptic Time.” After the same two-finger gesture, your watch will use haptic vibrations in a Morse-code fashion to convey the hour and minutes; enable this in Settings > Clock > Taptic Time.
Now all you have to do is learn how Taptic Time is translated. The primary option is what Apple calls “Digits,” where a long tap means 10 hours and a short tap means one hour, followed by a long tap for 10 minutes and a short tap for one minute. There’s a quicker version called “Terse.” Long taps mean five hours and 15 minutes, with a short tap only meaning one hour. Taptic Time could be useful if you need to check the time without being seen doing it (such as when in a meeting) or without being able to see the screen. It’s also especially useful for people who are visually impaired.
Control your watch one-handed with AssistiveTouch
You may already be familiar with Apple Watch’s double-tap gesture, available on the SE 3, Series 9, and Ultra 2 or later. Basically, a two-pinch gesture can control contextual actions like stopping timers or answering calls. However, AssistiveTouch is a lesser-known accessibility feature that, in effect, lets you control almost your entire Apple Watch with just one hand. It’s nearly identical to the Universal Gestures available on Samsung Galaxy Watches.
Here’s how it works: Doing a finger pinch moves to the next item, while a double pinch goes back; fist-clenching selects items, and a double fist-clench summons the action menu. So now you can move through notifications, scroll through the Smart Stack, navigate menus and settings, and more. Since the Apple Watch has such a simple interface, this means you could (for the most part) control it entirely one-handed in situations where you need or want to, particularly if your hands aren’t clean or your non-Apple Watch hand is occupied.
And that’s really only the beginning. You can customize AssistiveTouch further, controlling what gestures do, enabling a motion pointer, setting the focus outline to move automatically, and allowing AssistiveTouch to authenticate things like Apple Pay. Really, almost everything is within its grasp. To turn AssistiveTouch on, go to Settings > Accessibility > AssistiveTouch.
Turn on Reduce Motion and Reduce Transparency for better battery life
As far as smartwatches go, Apple Watch battery life is pretty good, with the SE getting about 18 hours on a full charge and the Ultra getting up to 42 hours. There are ways to potentially squeeze even more battery life out of it without having to resort to Low Power Mode, which would deprive you of a lot of the cool features the Apple Watch has. Note, we don’t have a side-by-side battery drain test to prove this one, but anecdotally (and judging by the experience of other users), enabling these two settings may extend the battery life on your Apple Watch. In exchange, you only have to tolerate a slightly less smooth and sleek user interface.
The first is Reduce Motion. Basically, this limits a lot of the animations within watchOS. The other is Reduce Transparency. Since you’re probably running watchOS 26 with the new Liquid Glass effect, this reduces the feature’s transparent look. You can find both of these settings in Settings > Accessibility on your Apple Watch or iPhone. Doing so can — based on my own experience — add a meaningful bump in battery life at the cost of an interface that’s only a fraction less pretty to look at. Apple also recommends going to Settings > Workout and enabling the “Fewer GPS and Heart Rate Readings” setting for more battery savings.
Turn on a simple passcode (and erase your device after multiple passcode failures)
By default, the Apple Watch uses a simple four-digit passcode to unlock it manually, aside from using your iPhone to unlock your Apple Watch over Bluetooth. There’s no Touch ID or other means to secure it. This means your Apple Watch (a device that is signed into your Apple Account and has access to things like Apple Pay) is somewhat weakly protected should it fall into the wrong hands. Four-digit PINs can be cracked in under a second by computers (via Messente). Shore up your Apple Watch’s security with two settings that are easy to enable.
In Settings, go to Passcode and disable the toggle for Simple Passcode. Now you’ll have a six-digit passcode instead. If your passcode is “1731” and you change it to “173184,” the time it takes to crack it goes up by an order of magnitude. It’s not foolproof, of course, which is why this second setting will be a game changer.
In Settings > Passcode, switch on “Erase Data.” The watch will erase itself after 10 failed passcode attempts. A thief trying to crack your Apple Watch would find it next to impossible to do so with a six-digit passcode and the Apple Watch erasing itself after too many bad attempts. Your Apple Account would be protected with very minimal inconvenience to you. Even accidentally erasing it when you put in the passcode wrong too many times would be very little skin off your nose, compared to erasing something like your iPhone; your Apple Watch is, functionally speaking, largely an extension of your iPhone, mirroring many of its abilities and settings.
Enable Fall Detection and Sleep Apnea notifications
Perhaps the Apple Watch’s marquee safety feature is its Fall Detection. In theory, your watch should detect when you’ve hit the ground hard and reach out to first responders automatically if you don’t respond after about a minute; it messages your emergency contacts, too. It’ll also set off an alarm for anyone nearby to hear. If you’re actually okay, the watch will still give you the option to cancel the emergency call. Yet unlike Crash Detection, another killer safety feature, it’s not enabled automatically.
Go to the Apple Watch app, navigate to the Emergency SOS section, and turn on Fall Detection. If you’re 55 years or older, then Fall Detection will already be on. You will need at least an Apple Watch SE, Apple Watch Series 4, or original Apple Watch Ultra for Fall Detection.
The Apple Watch famously does a pretty good job of tracking your sleep. As an added bonus, you can use it to monitor for signs of sleep apnea. Note, this is not a medical-grade monitor for someone with sleep apnea; it’s using the accelerometer to look for signs that would suggest sleep apnea in an adult who hasn’t been diagnosed, and then, after a 30-night monitoring period, provides a notification if consistent signs are detected. It goes without saying that a doctor is the one who needs to give a formal diagnosis and determine the appropriate next steps. Go to your iPhone’s Health app, search for the Respiratory category, then find Sleep Apnea Notifications and complete the setup process. Unfortunately, the sleep apnea feature is available only on the Apple Watch SE 3, Apple Watch Series 9 and later, and Apple Watch Ultra 2 and later.