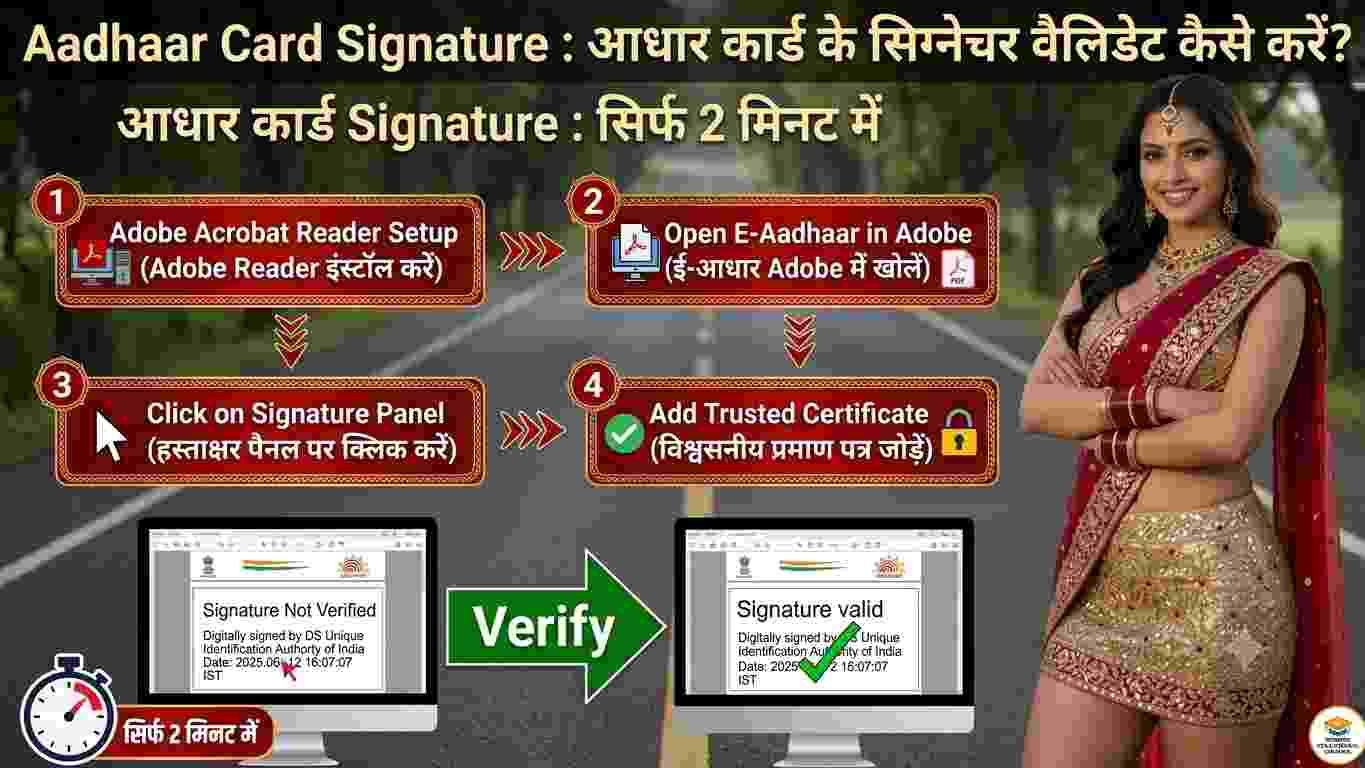
New Delhi/Lucknow: In today's digital era, from opening a bank account to getting a SIM card, availing benefits of government schemes and travelling, Aadhaar Card has become the most important identity card everywhere. Often people download their e-Aadhaar in PDF format from the official website of Unique Identification Authority of India (UIDAI) and take a printout of it. But many times when you submit that printout to any government office, bank or verification center, the officials reject it. The biggest reason for this is the yellow question mark seen at the bottom of the Aadhar card and 'Validity Unknown' written on it. According to UIDAI rules, the PDF copy of e-Aadhaar is considered legally valid only when its digital signature is verified and a green tick appears on it. What is Aadhaar digital signature and why work gets stuck without validating it? When you download your e-Aadhaar from the UIDAI portal, an electronic digital signature is put on that document by the authority to keep it safe and secure from tampering. This signature is a proof that your Aadhaar card is genuine and it has been issued directly from the UIDAI servers. When you open the PDF file for the first time, the computer software does not recognize the UIDAI digital certificate, due to which a yellow question mark appears there. If you print Aadhaar card without validating the signature, the document may be declared invalid for bank KYC, passport verification or school-college admission. Therefore, it is mandatory to validate it before taking the print out. Step-by-step method to validate e-Aadhaar card signature from computer or laptop The process of verifying the digital signature of e-Aadhaar card is very simple and for this you do not need to go to any cyber café or public service center. First of all, install 'Adobe Acrobat Reader DC' software in your computer or laptop, because the option to validate signature is not available in normal browser or other PDF viewer. Now right-click on your downloaded e-Aadhaar PDF and select 'Open with Adobe Acrobat Reader'. When the file opens, enter the 8 digit password, which is the first four capital letters of your name and your year of birth (YYYY). After opening the PDF, a yellow question mark written 'Validity Unknown' will appear at the bottom right. Right-click on that question mark and click on the 'Validate Signature' option in the menu that opens. After this a pop-up window will open, in which you have to click on the 'Signature Properties' button. Select the 'Show Signer's Certificate' option on the next screen. Here you will see several tabs at the top, among which click on the 'Trust' tab and press the 'Add to Trusted Identities' button below. A security warning message will appear on the screen, click on 'OK'. After this, in the window that opens, tick 'Certified Documents' and the three checkboxes given below it (Dynamic Content, Embedded High Privilege JavaScript and Privileged System Operations) and press 'OK'. Finally, coming back to the 'Signature Properties' window, click on 'Validate Signature' and close the window. You will see that the yellow question mark has immediately changed to a green tick with 'Signature Valid' written on it. Can Aadhaar card signature be validated through smartphone also? Most people have a question in their mind whether they can validate e-Aadhaar signature from their Android or iPhone. Technically, the normal PDF viewer app on mobile has limited facility to add the certificate to the trusted identity, however, you can check the status of the digital signature through the 'Adobe Acrobat Reader' app on Android phones. The best option for the citizens of Lucknow, Kanpur, Varanasi, Prayagraj and rural areas of Uttar Pradesh is that after validating the signature on laptop or desktop, save that PDF file through 'Print to PDF' option, so that the validated Aadhar card with green mark remains safe in your mobile forever and you can print it anywhere.